Please remember that SVA only supports 802.11a/n or 802.11a/n/ac (5-GHz) wireless devices.
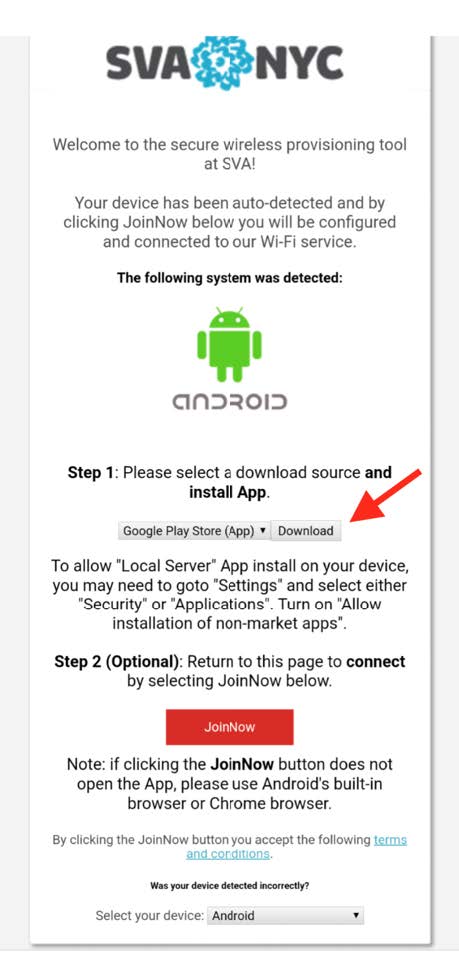
1. From your wireless device, open up a web browser and navigate to wifi.sva.edu.
2. You will be greeted by the below page. Click on the “Download” button to be taken to the Google Play Store.
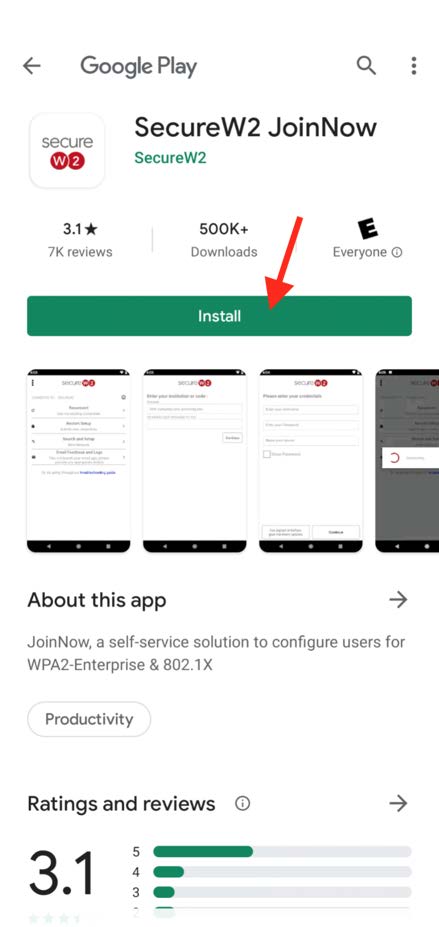
3. Once there, click “Install” to download and install the SecureW2 JoinNow App.
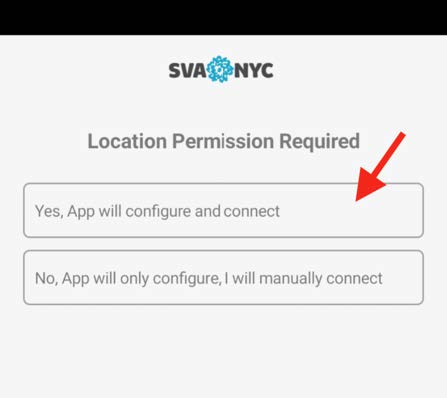
4. Next, click on “Yes, App will configure and connect” to begin the installation.
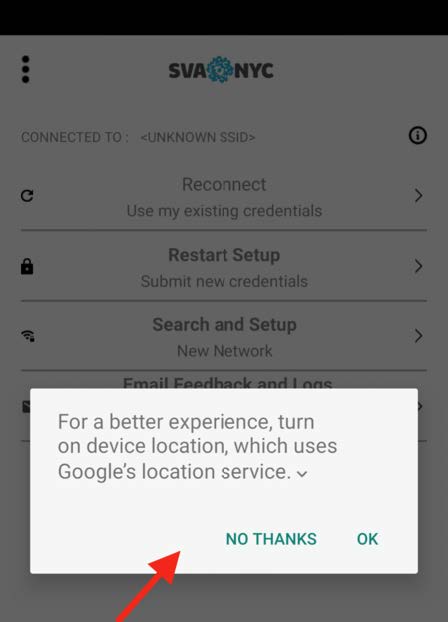
5. Decide if you want to enable Google’s Location Service.
6. At the screen shown below, click “Next” to be taken to the myID sign-in page.

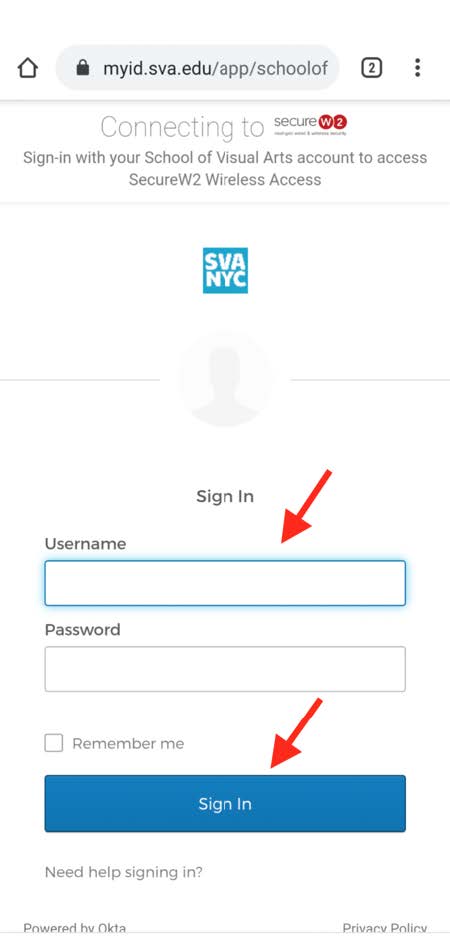
7. Enter your myID credentials and click “Sign In”.
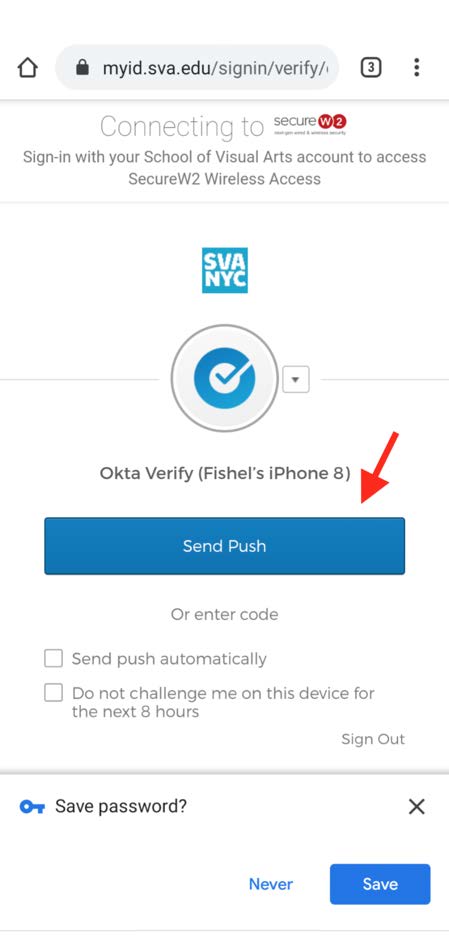
8. Continue with the authentication process (NOTE: The method of secondary authentication that you have set up for yourself may vary from the one shown below).
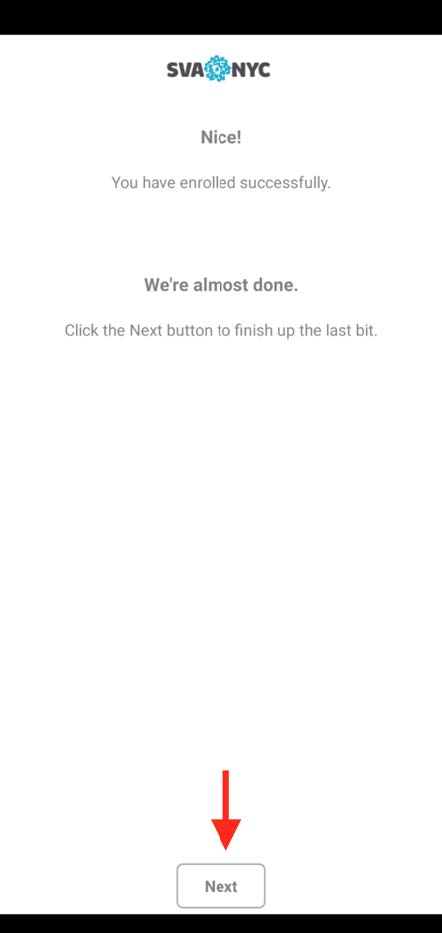
9. After successfully completing the MFA process, click “Next” on the screen shown below.
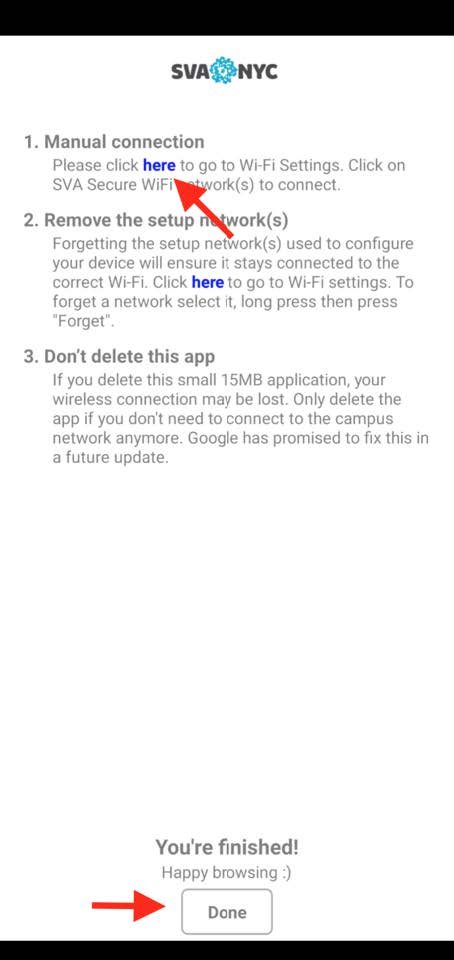
10. At the screen shown below, read the caveats, and either click on “here”, where indicated, or click “Done” at the bottom.
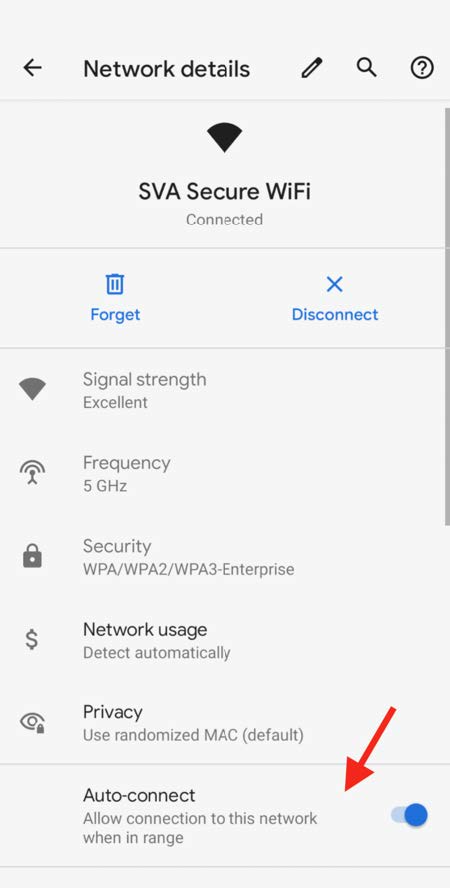
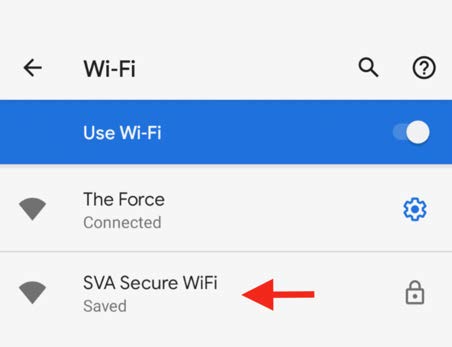
11. Once you get to the screen shown below, click on the SSID called “SVA Secure WiFi”.
12. Once connected, click on the gear to the right of the SVA Secure WiFi SSID.

13. In the SSID’s properties as shown below, make sure that “Auto-connect” is turned on.