Please remember that SVA only supports 802.11a/n or 802.11a/n/ac (5-GHz) wireless devices.
1. From your wireless device, open up a web browser and navigate to wifi.sva.edu.
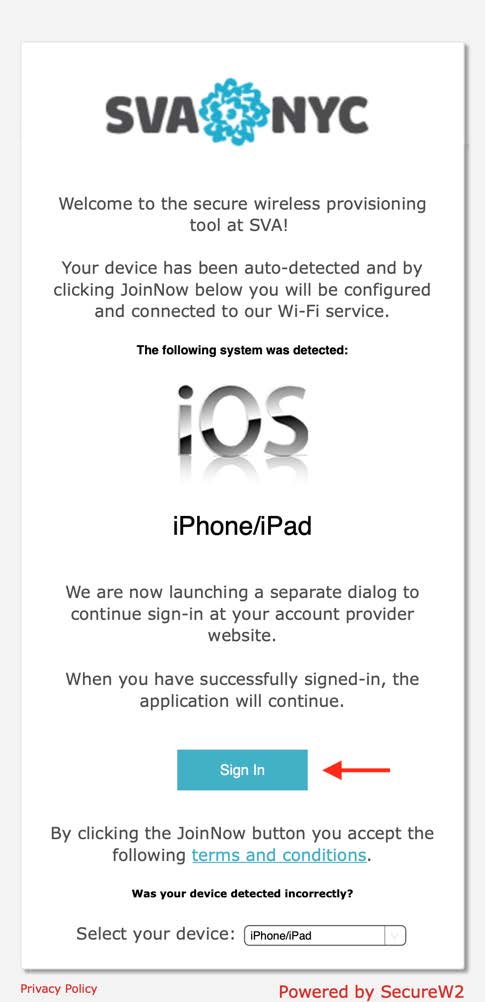
2. You will be greeted by the below page. Click on the “Sign In” button to be taken to the SVA myID login page for authentication.
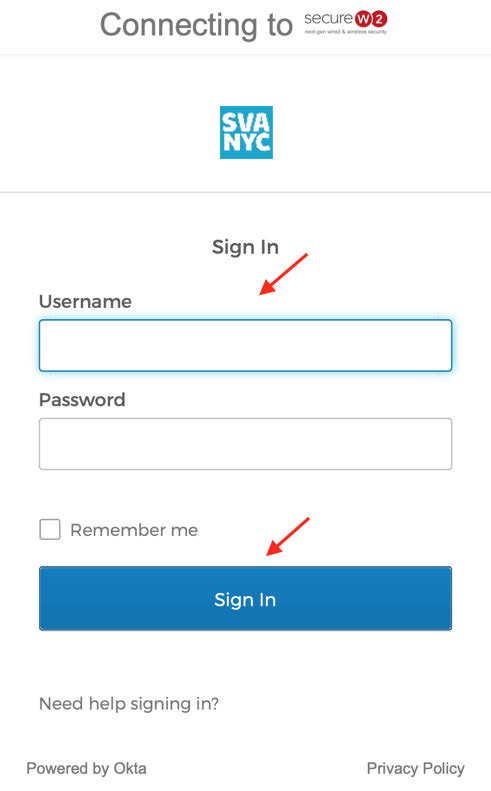
3. Fill in your myID credentials and click “Sign In.”
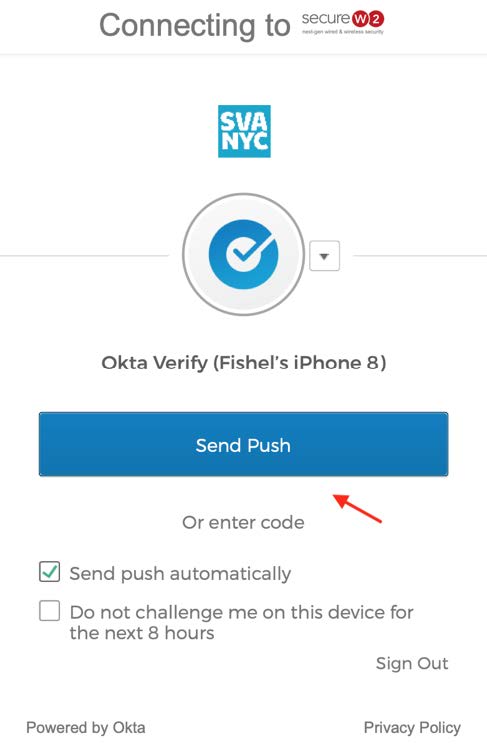
4. Continue with the authentication process (NOTE: The method of secondary authentication that you have set up for yourself may vary from the one shown below).
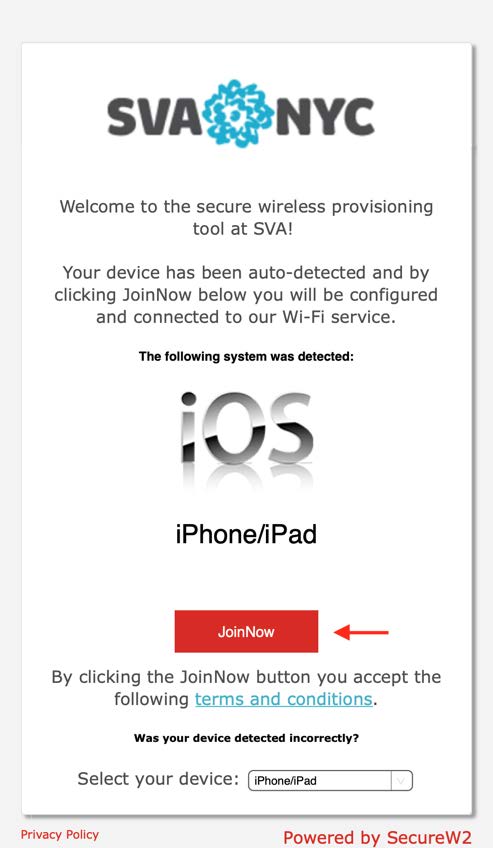
5. Once authenticated, close the Okta window and navigate back to your open web browser. You will now be greeted by the below page. Click on the “Join Now” button to begin the process of downloading the configuration profile.
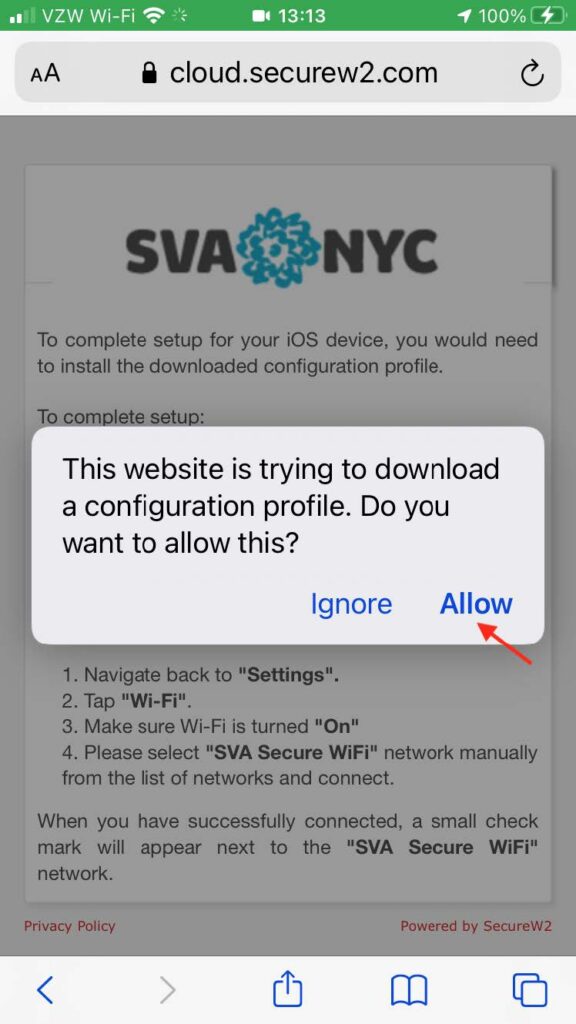
6. At the permission screen shown below, click “Allow.”
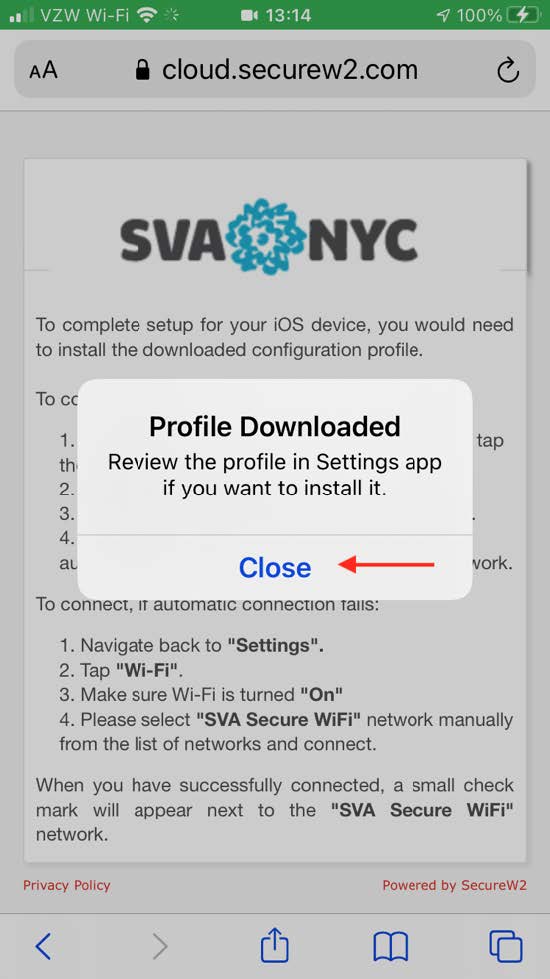
7. You will now see a confirmation message letting you know that the configuration profile has been successfully downloaded. Click “Close.”
8. Navigate to Settings -> Profile Downloaded. For the SVA profile, click “Install.”

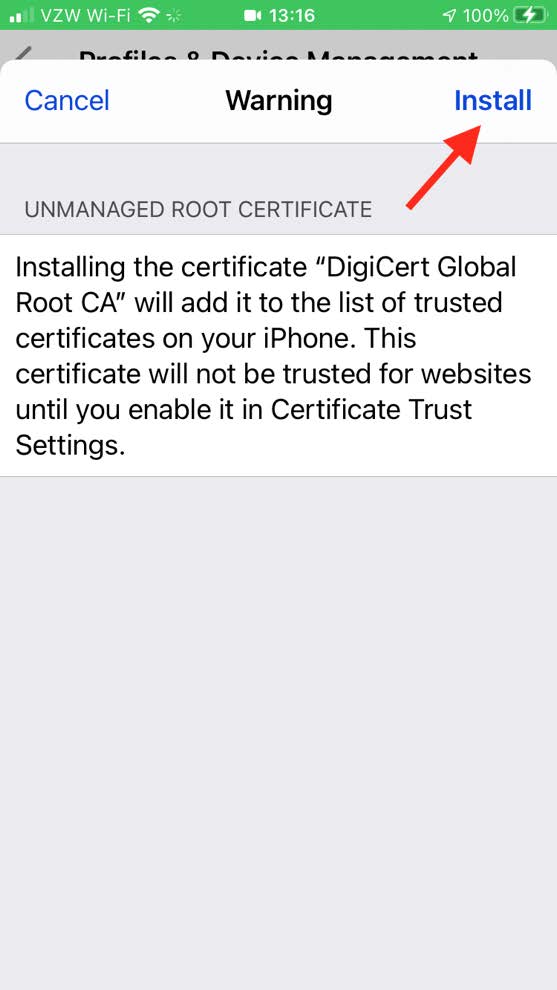
9. Next, you will be asked to install a certificate. Click “Install”.
10. Continue with the installation as shown.

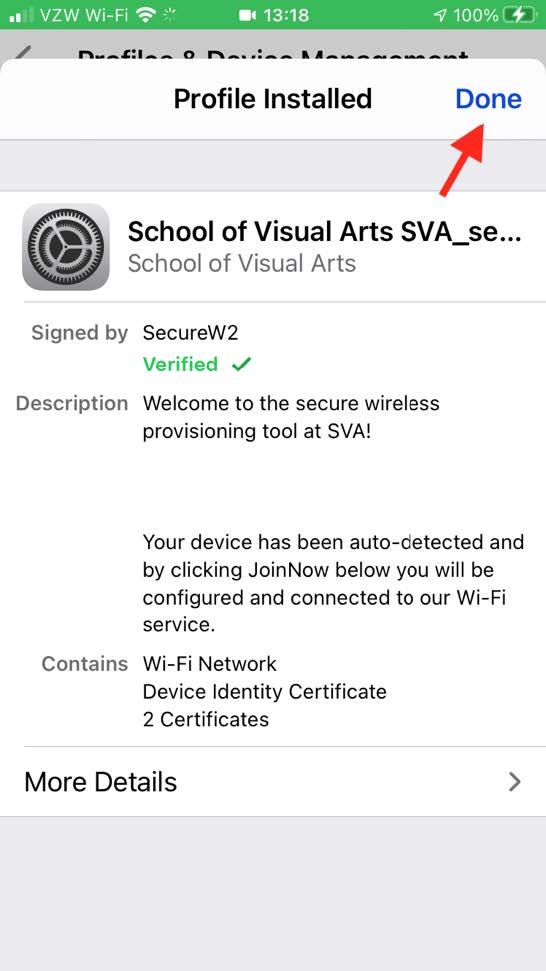
11. Once the configuration profile has been installed successfully, you will see the below confirmation.
Click “Done.”
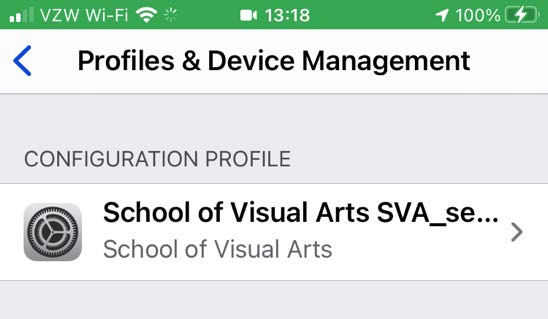
12. Your Configuration Profile will appear as below.
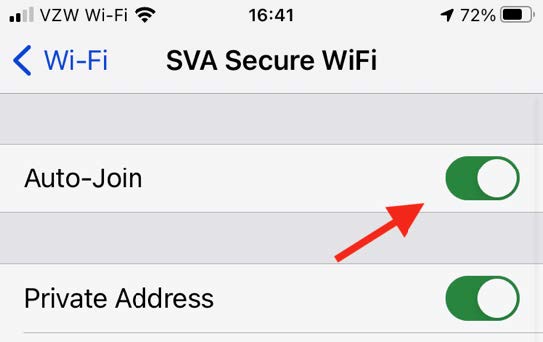
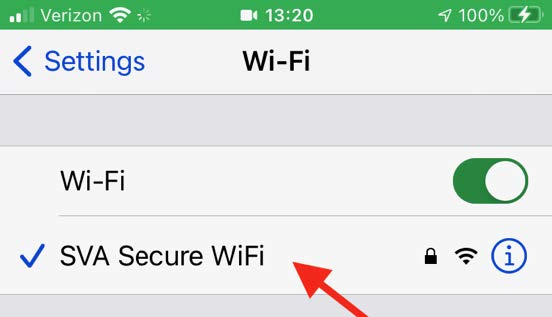
13. Navigate to Settings -> Wi-Fi, and wait for the “SVA Secure WiFi” SSID to appear. Select it and wait for a successful connection checkmark as shown below (NOTE: If you are preparing your device to connect to SVA’s secure wireless network when you are off campus, you will not see the “SVA Secure WiFi” SSID. In this instance, you will need to complete steps 13-15 when on campus).
14. Next, click on the blue (i) circle as shown below.
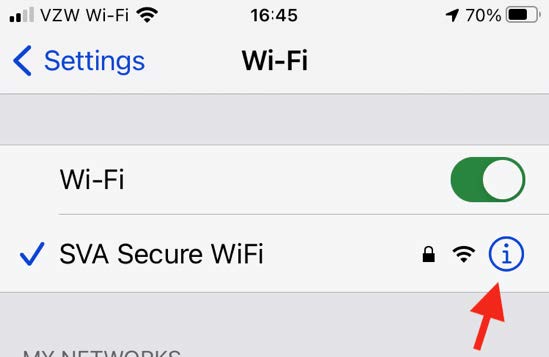
15. Confirm that the Auto-Join option is selected. If it isn’t, select it, and then exit Settings.