Please note: Connecting to the wifi.sva.edu page to install your certificate, requires that you have a working internet connection. For your convenience, installation of the certificate can be done from anywhere that you have an internet connection – including off campus. However, if you are attempting to install the certificate for the first time from within the SVA campus, one of the following will have to be done to enable your ability to get to wifi.sva.edu for the onboarding process.
1) Turn your cell phone into a hotspot and connect to it, allowing you to share its internet connection.
2) Use your cell phone or any other internet-connected device to request a guest wireless account and use the generated credentials to log onto the SVA Guest WiFi network.
Once you have established an internet connection on the device in need of the certificate, continue to follow the process below to complete the onboarding process.
Please remember that SVA only supports 802.11a/n or 802.11a/n/ac (5-GHz) wireless devices.
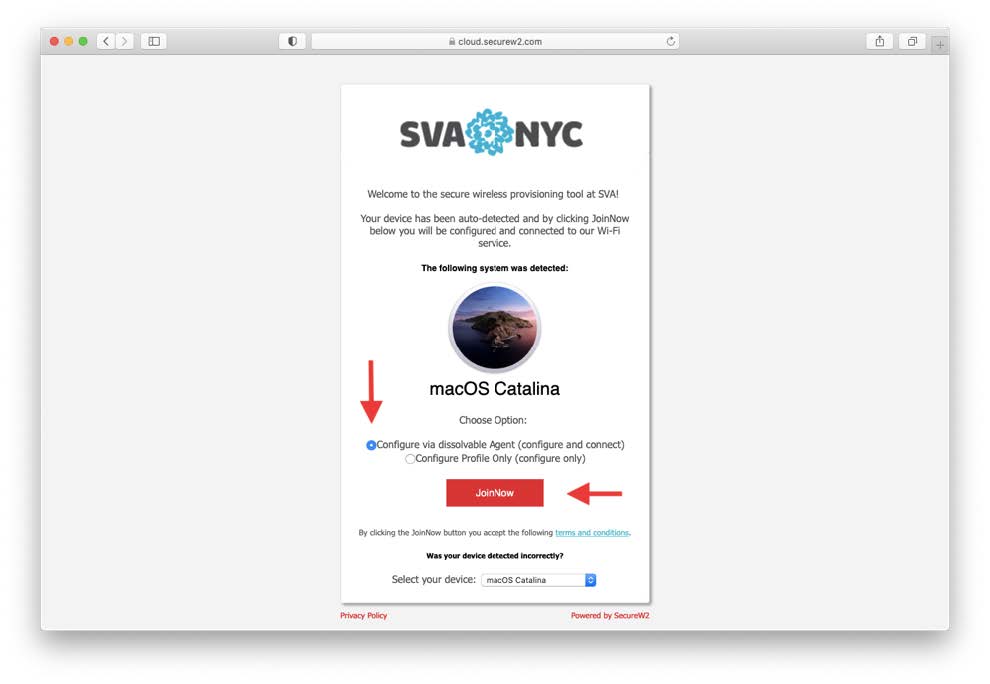
1. From your wireless device, open up a web browser and navigate to wifi.sva.edu.
2. You will be greeted by the below page. Select the radio button next to “Configure via dissolvable Agent,” and click the “Join Now” button.
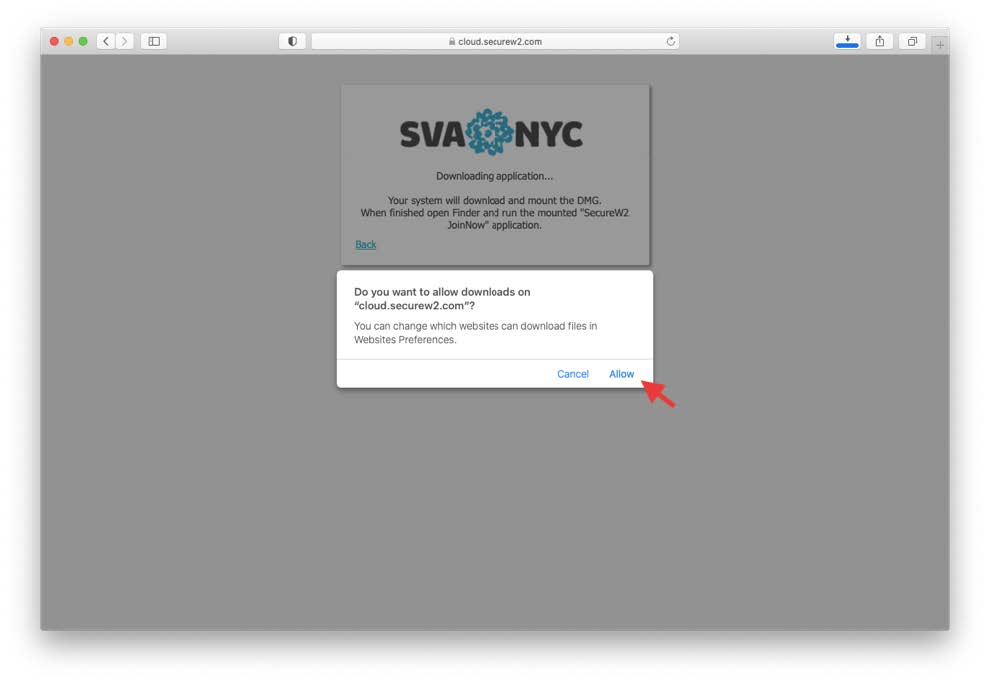
3. You will be prompted for permission to download the dissolvable agent. Click on “Allow.”
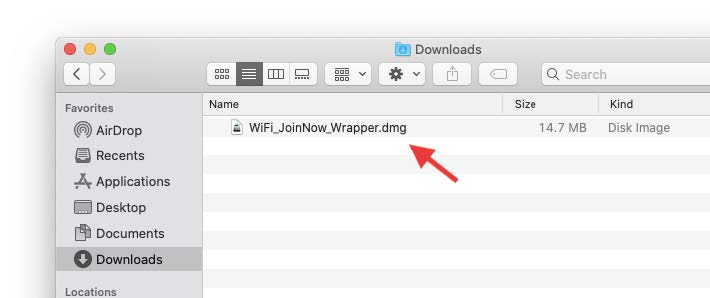
4. Navigate to the location of the downloaded installer file. Depending on your browser, this can be the Desktop, Downloads folder, or any other location you may have specified. Once located, double-click the installer file to begin the installation.
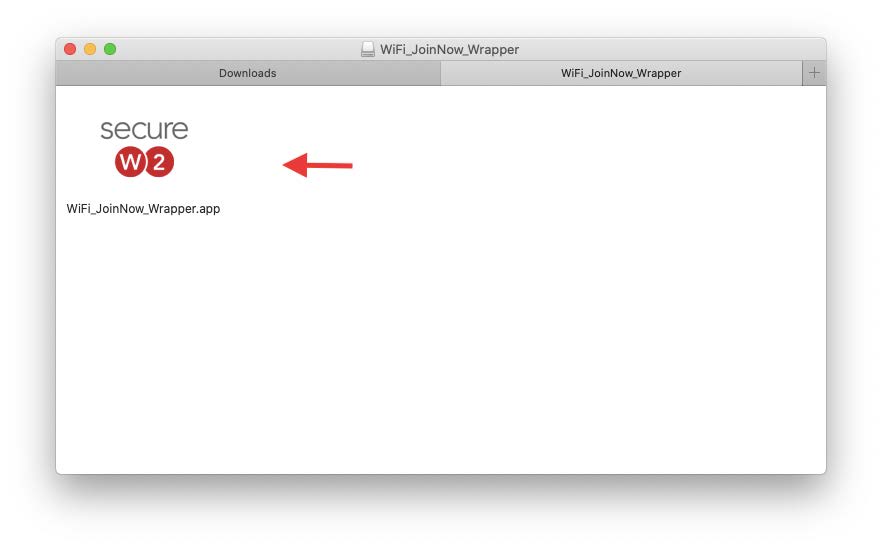
5. A volume will then mount, and a window with the configuration app will open. Double-click on the app to launch the configuration utility.
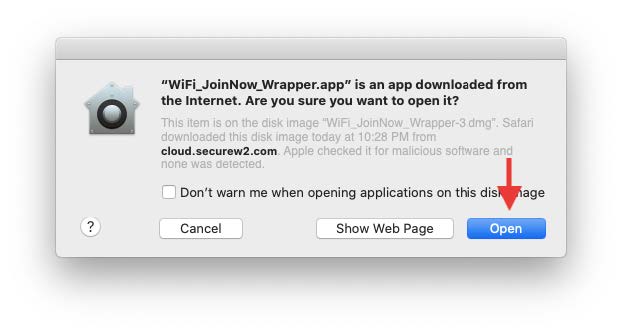
6. A message warning you that the configuration utility app is an app downloaded from the Internet, will pop up. Click “Open.”
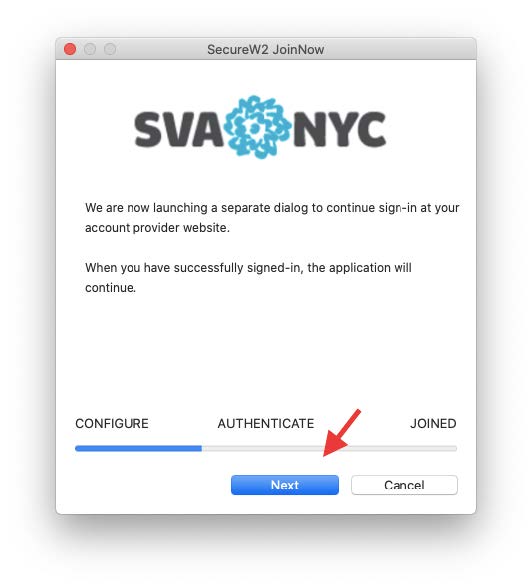
7. Next, on the authentication landing window shown below, click “Next.”
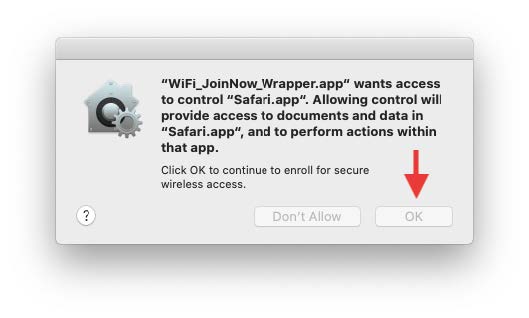
8. From this point on, you may get a series of prompts requesting permission to access different areas of your OS (NOTE: These prompts will vary based on the web browser that you are using, and your security settings. For all such prompts, grant permission. If prompted to enter credentials for any of these, it must be those of a local administrator on the computer). Using Safari, click on “OK” as shown below.
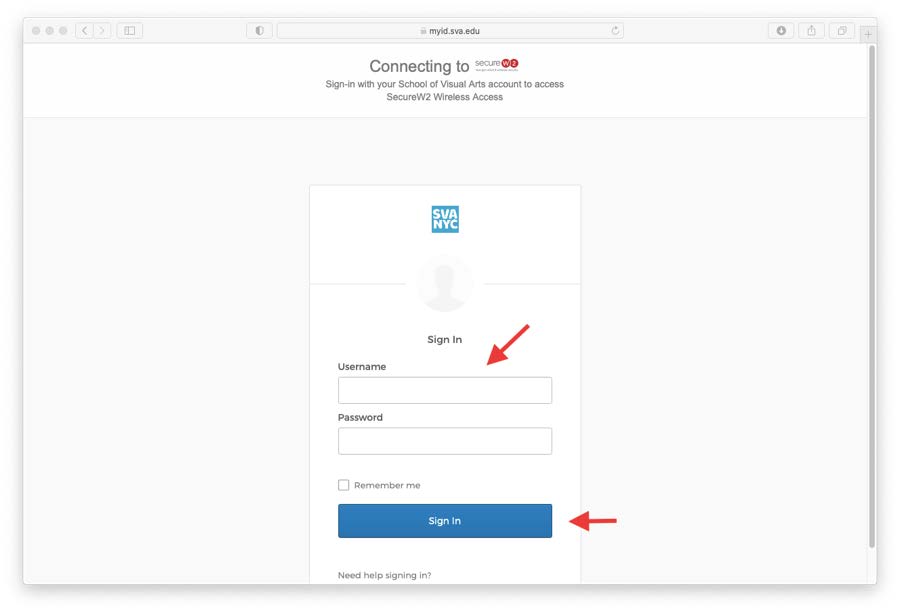
9. After you grant the requested permissions, you will then be taken to the myID sign-in page. Please fill in your myID credentials, and click “Sign In.”
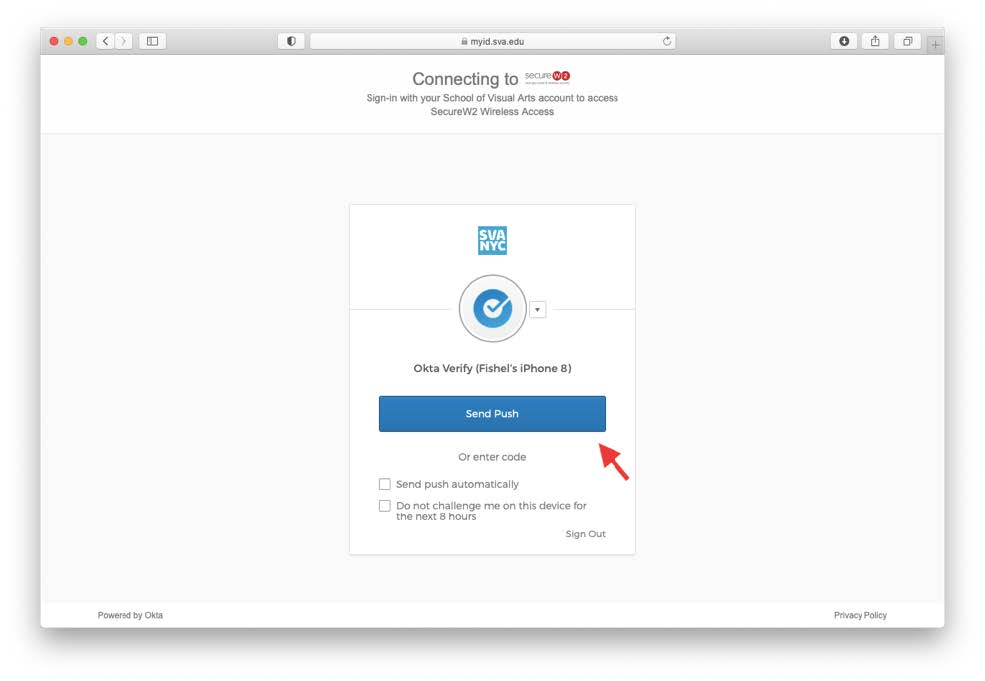
10. Continue with the authentication process. (NOTE: The method of secondary authentication that you have set up for yourself may vary from the one shown below).
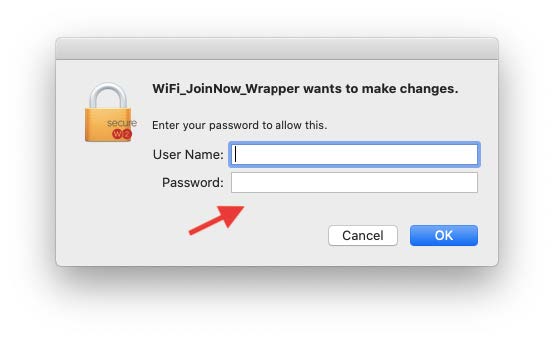
11. After the authentication process, you will be prompted with a request to allow the dissolvable agent to make changes to your OS. Enter the credentials of an administrator account on your computer, and click “OK.”
*The local administrator account on your personal computer is not the same as your SVA login unless you are on an SVA-owned and managed device and have administrative privileges.
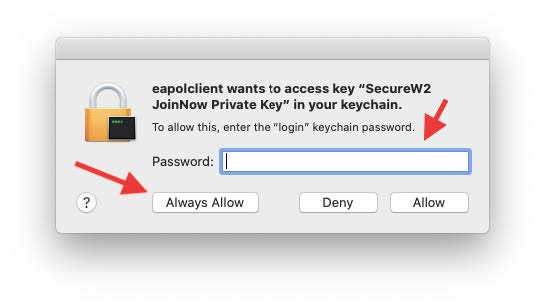
12. You will then be asked to grant access to your KeyChain. Enter a local administrator account password, and click “Always Allow.”
*If your local administrator password is blank, leave the field blank and click “Always Allow.”
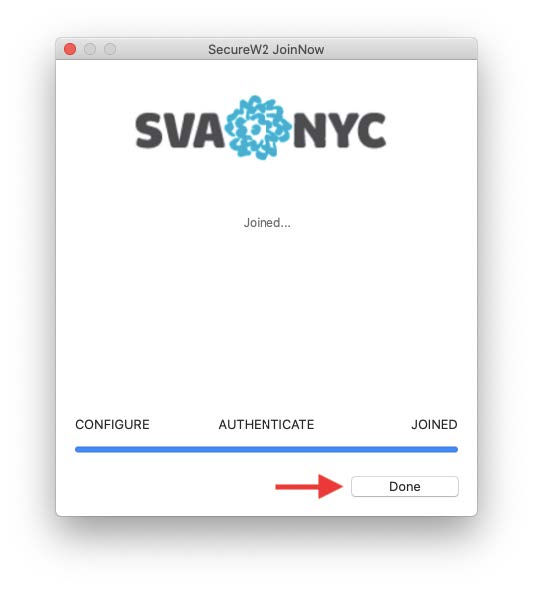
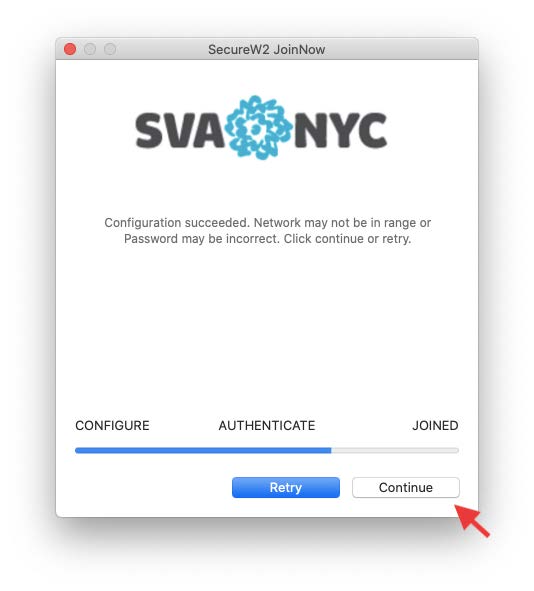
13. Back at the dissolvable agent utility, you should get a “Joined” message. Click “Done.”
If you get a message with an error as shown below, click “Continue.”
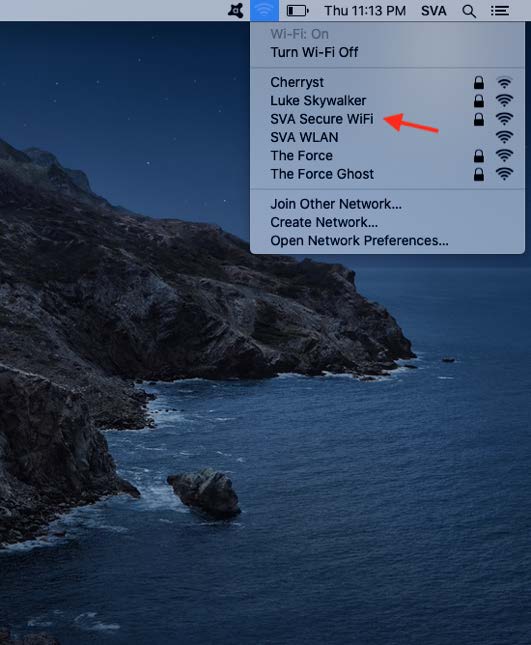
14. Next, locate the SSID “SVA Secure WiFi,” and select it (NOTE: If you are preparing your device to connect to SVA’s secure wireless network when you are off campus, you will not see the “SVA Secure WiFi” SSID. In this instance, you will need to complete steps 14-19 when on campus).
15. Upon selecting it, a request for credentials will appear. For “Mode,” select “EAP-TLS” from the dropdown menu.
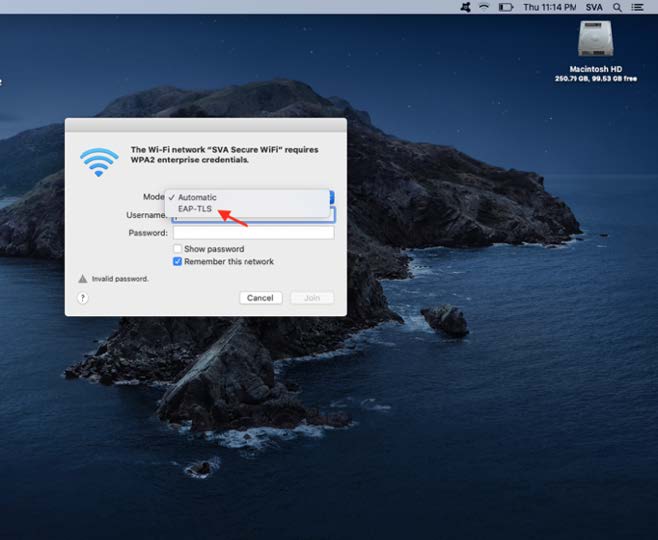
16. Once you change the Mode to EAP-TLS, the next field down will change its name to Identity. From the drop-down menu, select your identity from the list. It should be your full name as registered with SVA. In the Username field, enter your myID username. Additionally, make sure that the “Remember this network” box is checked.

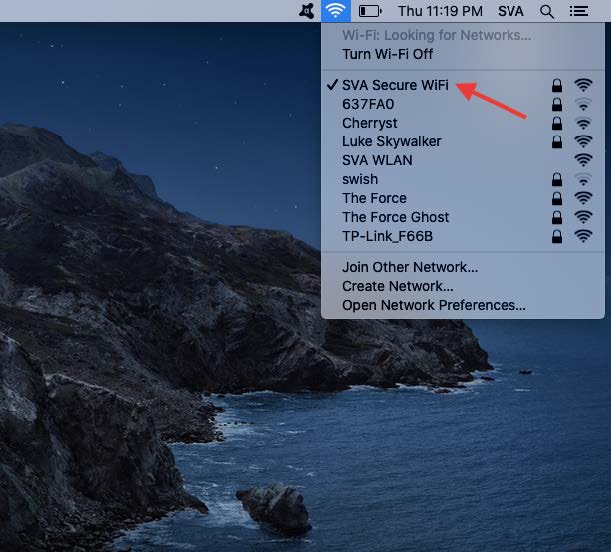
17. Next, click on the wireless network icon on the task bar, and confirm that there is a checkmark by the “SVA Secure WiFi” SSID.
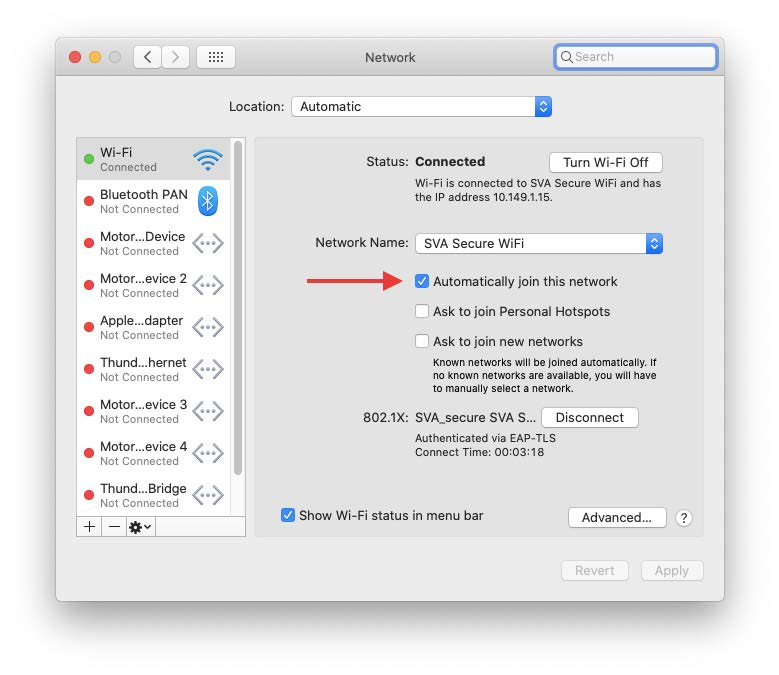
18. Next, open System Preferences -> Network, and confirm that there is a checkmark in the box next to “Automatically join this network.” If not, select it and click “Apply.”
19. After you have successfully connected, you may close any open windows, and eject the volume containing the configuration utility.